Winter Indoor Training Setup Guide 2026: Complete Home Gym for Runners & Cyclists
Build the ultimate indoor training space for productive winter workouts. Complete smart trainer setup, treadmill training strategies, indoor cycling app comparisons, and gear recommendations to maintain fitness through the cold months.
Updated 2026 | By the RunBikeCalc Team
The Quick Answer: Winter Training Essentials
A productive winter indoor training setup requires three core elements: quality equipment (smart trainer or treadmill), engaging software (Zwift, TrainerRoad, or similar apps), and proper environment (ventilation, entertainment, comfort). For cyclists, invest in the best smart trainer you can afford - the Wahoo KICKR or KICKR CORE are excellent choices. For runners, a quality treadmill with good cushioning and incline capability keeps you running safely through winter. Add a high-velocity fan, training mat, and your preferred app subscription to complete your setup.
What's in This Guide
- Smart Trainer Setup: Complete Configuration Guide
- Best Smart Trainers for Indoor Cycling
- Treadmill Training: Maximizing Indoor Running
- Best Treadmills for Runners
- Indoor Cycling Apps: Zwift vs TrainerRoad vs Others
- Building Your Pain Cave: Environment Setup
- Essential Accessories & Gear
- Indoor Workout Ideas & Structures
- Staying Motivated Through Winter
- FAQ
Smart Trainer Setup: Complete Configuration Guide
A properly configured smart trainer is the foundation of effective indoor cycling. Whether you're training for races, maintaining fitness, or enjoying virtual worlds, getting your setup right ensures accurate data, comfortable rides, and reliable connectivity.
Direct-Drive vs. Wheel-On Trainers
Direct-Drive Trainers
Your rear wheel is removed and the chain connects directly to the trainer's cassette.
- Pros: More accurate power, quieter, better road feel, no tire wear
- Cons: Higher cost, heavier, requires matching cassette
- Best for: Serious training, Zwift racing, structured workouts
- Examples: Wahoo KICKR, Tacx NEO, Elite Suito
Wheel-On Trainers
Your rear wheel stays on and presses against a resistance roller.
- Pros: Lower cost, lighter, quick setup, works with any bike
- Cons: Less accurate, louder, tire wear, requires regular calibration
- Best for: Budget training, occasional use, beginners
- Examples: Wahoo KICKR SNAP, Tacx Flow
Step-by-Step Smart Trainer Setup
Direct-Drive Trainer Installation
- 1. Install the Cassette: Mount a cassette matching your bike's drivetrain (typically 8-12 speed Shimano/SRAM). You'll need a cassette lockring tool and chain whip. Ensure the cassette is fully seated and tightened to spec (40 Nm).
- 2. Configure Axle Adapters: Most trainers include adapters for various axle standards (130mm/135mm QR, 142x12mm thru-axle). Install the correct adapter before mounting your bike.
- 3. Mount Your Bike: Remove rear wheel and mount bike onto trainer. For thru-axle bikes, thread the provided trainer axle through the frame and trainer. For QR bikes, use the quick-release skewer.
- 4. Adjust Trainer Height: Ensure the bike is level. Some trainers have adjustable legs; others include riser blocks for the front wheel to level the bike.
- 5. Connect Power: Plug in the trainer (required for resistance control and most functions). Allow 30 seconds for initial boot-up.
- 6. Pair with App: Enable Bluetooth and/or ANT+ on your device. In your training app, scan for sensors and pair the trainer as both a power source and controllable trainer.
- 7. Perform Spindown Calibration: After 10 minutes of warmup riding, use the trainer's app or your training app to perform calibration. This ensures accurate power readings.
Calibration and Accuracy
When to Calibrate Your Trainer
- After initial setup: Always calibrate before your first ride
- Temperature changes: Recalibrate if trainer moved from cold to warm environment
- Every 2-4 weeks: Regular calibration maintains accuracy
- Before FTP tests: Ensure maximum accuracy for benchmark efforts
- If data seems wrong: Sudden power drops or spikes may indicate calibration needed
Pro Tip: Always warm up for 10 minutes before calibrating. Cold trainers give inaccurate calibration results.
Connectivity Troubleshooting
Common Connection Issues & Solutions
- Trainer not found: Ensure Bluetooth/ANT+ is enabled on device. Power cycle the trainer. Check that trainer isn't connected to another device.
- Connection drops: Move your device closer to the trainer. Disable WiFi to reduce Bluetooth interference. Use ANT+ dongle instead of Bluetooth if available.
- ERG mode not working: Ensure trainer is paired as "Controllable" not just "Power." Check app settings for ERG mode activation.
- Power reading discrepancies: Perform spindown calibration. Update trainer firmware. Check for interference from other ANT+/Bluetooth devices.
- Cadence not showing: Some trainers estimate cadence from power fluctuations. For accurate cadence, pair a separate cadence sensor.
Best Smart Trainers for Indoor Cycling
Choosing the right smart trainer depends on your budget, training goals, and space constraints. Here are our top recommendations for 2026:
Wahoo KICKR V6
The gold standard for smart trainers. Industry-leading accuracy, reliability, and ecosystem.
Highlights
- +/- 1% power accuracy
- WiFi + Bluetooth + ANT+
- Whisper-quiet operation
- AXIS adjustable feet
- Auto-calibration
Specs
- Max Power: 2200W
- Max Incline: 20%
- Flywheel: 16 lbs
- Weight: 47 lbs
Wahoo KICKR CORE
90% of KICKR performance at 70% of the price. Outstanding value for serious training.
Highlights
- +/- 2% power accuracy
- Bluetooth + ANT+
- Quiet belt drive
- Same Wahoo reliability
- Works with all accessories
Specs
- Max Power: 1800W
- Max Incline: 16%
- Flywheel: 12 lbs
- Weight: 40 lbs
Tacx NEO 3M
The most immersive indoor cycling experience with road surface simulation and motion.
Highlights
- Road surface simulation
- No calibration needed
- Near-silent operation
- Built-in motion
- Virtual shifting
Specs
- Max Power: 2200W
- Max Incline: 25%
- Accuracy: +/- 1%
- Weight: 50 lbs
See our complete guide: Best Smart Trainers 2026: Complete Buyer's Guide
Treadmill Training: Maximizing Indoor Running
Treadmill running offers unique advantages for winter training: consistent conditions, precise pace control, and safety from icy surfaces. With proper technique and training approaches, treadmill running can be just as effective as outdoor training.
Treadmill vs. Outdoor Running
Physiological Differences
- No wind resistance: Set 1-2% incline to compensate
- Belt assists turnover: Slightly reduced hamstring activation
- Consistent surface: Less proprioceptive demand
- Temperature controlled: May need extra cooling
Training Advantages
- Precise pacing: Perfect for tempo and interval work
- Controlled incline: Excellent hill training tool
- Safe stopping: Can end workout instantly if needed
- Consistent conditions: Great for heat acclimation
Treadmill Running Technique Tips
- Set 1-2% incline: Compensates for lack of wind resistance and belt assistance. This makes treadmill effort more equivalent to outdoor flat running.
- Maintain natural form: Run as you would outside. Avoid shortening stride or holding handrails. If you need to hold on, slow down.
- Look forward, not down: Keep your gaze up and ahead, not at the console. This maintains proper head position and running posture.
- Use the full belt: Don't crowd the front. Position yourself in the center-back of the belt for natural stride length.
- Wear proper shoes: Same running shoes as outdoor running. Consider slightly lighter cushioning since the belt provides some absorption.
- Fan placement: Position a fan directly in front of you to simulate wind and aid cooling. Indoor running generates significant heat.
Incline Guidelines
| Purpose | Incline Setting | Notes |
|---|---|---|
| Simulating flat outdoor running | 1-2% | Standard for most running |
| Recovery runs | 0-1% | Keep effort truly easy |
| Moderate hill simulation | 4-6% | Rolling hills feel |
| Steep hill repeats | 8-12% | Strength building |
| Power hiking/incline walking | 12-15% | At walking pace |
Sample Treadmill Workouts
Progressive Tempo
- 10 min warmup easy
- 5 min at marathon pace
- 5 min at half marathon pace
- 5 min at 10K pace
- 10 min cooldown easy
Hill Repeats
- 10 min warmup at 1%
- 8 x (2 min at 6-8% incline hard, 2 min at 0% easy jog)
- 10 min cooldown at 1%
Speed Intervals
- 10 min warmup + 4 strides
- 6 x (3 min at 5K pace, 2 min easy)
- 10 min cooldown
Long Run Simulation
- 60-90 min at easy pace
- Vary incline 0-3% every 10 min
- Practice race nutrition
- Entertainment essential!
Best Treadmills for Runners
A quality running treadmill differs significantly from a walking treadmill. Runners need sufficient belt size, motor power, cushioning, and incline capability for serious training.
Key Features for Running Treadmills
- Belt size: Minimum 20" x 60" for comfortable running; 22" x 60" ideal
- Motor: 3.0+ CHP continuous horsepower for sustained running
- Speed range: At least 12 mph for interval training
- Incline: 12-15% minimum; decline capability is a bonus
- Cushioning: Adjustable or running-specific deck reduces impact
- Stability: Heavy, stable frame that doesn't shake at speed
NordicTrack Commercial Series
Excellent running treadmills with iFit integration for interactive training. Solid build quality and good cushioning for serious runners.
- 22" x 60" belt, 3.75 CHP motor
- 0-15% incline, -3% decline
- Speed to 12 mph
- iFit compatible for virtual runs
See our complete guide: Best Treadmills 2026: Complete Buyer's Guide
Indoor Cycling Apps: Zwift vs TrainerRoad vs Others
The software you choose shapes your indoor training experience. Each platform has distinct strengths that suit different training styles and goals.
| Feature | Zwift | TrainerRoad | Rouvy | Wahoo SYSTM |
|---|---|---|---|---|
| Price/month | $14.99 | $19.99 | $14.99 | $14.99 |
| Virtual world | Yes (animated) | No | Yes (real video) | Limited |
| Structured workouts | Good | Excellent | Good | Excellent |
| AI training plans | Basic | Adaptive Training | No | Yes |
| Racing | Excellent | No | Limited | No |
| Social features | Excellent | Good | Good | Good |
| Running support | Yes | No | No | Limited |
| Best for | Entertainment, racing | Structured training | Real-world routes | Complete training |
Zwift
Best for riders who need motivation and entertainment to complete indoor sessions. The gamified experience, group rides, and racing make boring trainer sessions engaging.
- Ideal user: Social riders, racers, motivation-seekers
- Workouts: Large library but less adaptive
- Unique feature: Massively multiplayer virtual world
TrainerRoad
Best for structured training focused on FTP improvement. Adaptive Training adjusts workouts based on your performance, ensuring optimal progression.
- Ideal user: Serious racers, time-crunched athletes
- Workouts: Science-based, highly structured
- Unique feature: Adaptive Training AI
Pro Tip: Use Both
Many serious athletes use TrainerRoad for structured workouts and Zwift for recovery rides and social events. You can run TrainerRoad workouts inside Zwift for the best of both worlds.
Building Your Pain Cave: Environment Setup
Your training environment significantly impacts workout quality and motivation. A well-designed "pain cave" makes winter training productive and almost enjoyable.
Essential Environment Elements
Ventilation & Cooling
The most critical factor for comfortable indoor training. Without wind, your body struggles to cool itself.
- Fan positioning: Direct airflow at your upper body and face
- Fan power: High-velocity industrial fans outperform home fans
- Multiple fans: One front, one side for cross-breeze
- Smart fans: Wahoo HEADWIND adjusts speed to heart rate
Floor Protection
Protect your floors and reduce noise with proper matting.
- Trainer mat: Catches sweat, dampens vibration
- Rubber tiles: Great for larger dedicated spaces
- Size: At least 30" x 60" for trainer area
- Treadmill mat: Larger size, extra thickness needed
Display & Entertainment
A good viewing setup keeps you engaged during long sessions.
- Screen size: Larger is better for immersion (32"+ recommended)
- Height: Center screen at eye level when in riding/running position
- Sound: Bluetooth speaker or headphones for audio
- Multiple options: Zwift on one screen, entertainment on another
Sweat Management
Indoor training produces far more sweat than outdoor riding due to reduced evaporation.
- Towels: Multiple towels within reach
- Bike protection: Sweat guards for frame and handlebars
- Electronics: Keep devices and cables away from drip zones
- Quick clean: Wipe down after every session
Sample Pain Cave Layout
- Trainer/Treadmill placement: Face wall with screen mounted or on stand
- Fan #1: High-velocity fan at head height, 3-4 feet in front
- Fan #2: Secondary fan at side angle for cross-ventilation
- Small table: Within arm's reach for phone, nutrition, water bottles
- Power strip: Mounted for trainer, fans, devices - away from sweat
- Hydration: Large water bottle or hydration station nearby
- Towel hooks: Multiple towels hanging within reach
Essential Accessories & Gear
The right accessories transform indoor training from tolerable to enjoyable. Invest in quality items that improve comfort, data accuracy, and training effectiveness.
High-Velocity Fan
The single most important accessory. Proper cooling makes hard efforts sustainable.
- Industrial/shop fans work best
- 18-20" diameter minimum
- Multiple speed settings
- Consider smart fan (Wahoo HEADWIND)
Trainer Mat
Protects floors, dampens vibration, and catches sweat.
- Minimum 30" x 60" size
- Dense rubber material
- Easy to clean surface
- 6mm+ thickness
Heart Rate Monitor
Accurate HR data for training zones and workout tracking.
- Chest strap most accurate
- Dual-band (ANT+ & Bluetooth)
- Comfortable for long sessions
- Wahoo TICKR or Polar H10
Rocker Plate
Adds natural side-to-side motion for more realistic ride feel and reduced saddle discomfort.
- Reduces static riding fatigue
- Better for longer rides
- More natural standing/sprinting
- Saris MP1 is popular choice
Other Useful Accessories
- Front wheel riser block: Levels bike on direct-drive trainers (often included)
- Sweat towel/catcher: Protects frame, stem, and handlebars from sweat damage
- Phone/tablet mount: Secure viewing position without holding device
- Desk/table: Stable surface for drinks, snacks, phone at proper height
- ANT+ USB stick: For computers without built-in ANT+ support
- Bluetooth speakers: Better audio than tablet/phone speakers
- Indoor cycling shoes: Dedicated pair to avoid tracking outdoor debris
Indoor Workout Ideas & Structures
Variety keeps indoor training interesting and ensures comprehensive fitness development. Here are effective workout structures for both cycling and running.
Indoor Cycling Workouts
FTP Builder (60 min)
- 10 min warmup at 50-60% FTP
- 3 x 10 min at 95-100% FTP
- 5 min recovery between intervals
- 10 min cooldown
Target: Threshold power improvement
VO2 Max Session (45 min)
- 10 min warmup with 2 openers
- 5 x 3 min at 110-120% FTP
- 3 min recovery between intervals
- 10 min cooldown
Target: Aerobic capacity
Endurance Ride (90 min)
- 90 min steady at 65-75% FTP
- Cadence variations every 15 min
- Practice nutrition strategy
- Entertainment essential!
Target: Aerobic base building
Sprints & Power (30 min)
- 10 min warmup
- 8 x 20 sec max effort
- 3 min recovery between sprints
- 5 min cooldown
Target: Neuromuscular power
Indoor Running Workouts
Ladder Intervals (50 min)
- 10 min warmup at 1% incline
- 1 min fast, 1 min easy
- 2 min fast, 2 min easy
- 3 min fast, 3 min easy
- Then back down: 2, 1
- 10 min cooldown
Incline Pyramid (45 min)
- 10 min warmup at 1%
- 3 min each: 2%, 4%, 6%, 8%
- Then back down: 6%, 4%, 2%
- Maintain steady pace throughout
- 10 min cooldown at 1%
Progression Run (40 min)
- 10 min easy pace
- 10 min marathon pace
- 10 min half marathon pace
- 5 min 10K pace
- 5 min cooldown
Recovery Jog (30 min)
- 30 min at truly easy pace
- 0-1% incline
- Heart rate in Zone 1-2
- Should feel effortless
- Great with entertainment!
Staying Motivated Through Winter
Winter indoor training tests mental fortitude as much as physical fitness. These strategies help maintain motivation through the darkest, coldest months.
Motivation Strategies
Structure & Accountability
- Schedule workouts: Block time like appointments
- Join group rides: Zwift events add social accountability
- Training plan: Follow structured program with goals
- Track progress: FTP tests every 4-6 weeks
- Announce goals: Tell others your targets
Environmental & Reward
- Enjoyable space: Make your pain cave comfortable
- Entertainment variety: Rotate between apps, shows, music
- Reward consistency: New gear for hitting milestones
- Spring goals: Register for spring race as motivation
- Train with friends: Virtual riding/running meetups
The 10-Minute Rule
On days when motivation is low, commit to just 10 minutes of exercise. Start your warmup and give yourself permission to stop after 10 minutes if you still feel terrible. In most cases, you'll continue once you're moving. Even if you don't, 10 minutes is better than nothing and maintains the habit.
Remember: Winter Builds Spring Fitness
Consistent winter training creates the aerobic base that powers spring performances. Athletes who maintain training through winter typically outperform those who take extended breaks. Every indoor session is an investment in your spring races and summer adventures.
Frequently Asked Questions
What is the best smart trainer for Zwift in 2026?
The Wahoo KICKR V6 is the best overall smart trainer for Zwift. It offers excellent power accuracy (+/- 1%), whisper-quiet operation, rock-solid Bluetooth and ANT+ connectivity, and the best ecosystem of accessories. For a more budget-friendly option, the Wahoo KICKR CORE delivers 90% of the performance at 70% of the price. The Tacx NEO 3M is best for immersive road feel.
Is Zwift or TrainerRoad better for indoor training?
It depends on your goals. Zwift is better for entertainment, social riding, racing, and gamified motivation. TrainerRoad is better for structured training, FTP improvements, and science-based progression. Many serious athletes use TrainerRoad for structured workouts and Zwift for recovery rides and social events.
How do I set up a smart trainer correctly?
For direct-drive trainers: 1) Install the correct cassette matching your bike's drivetrain. 2) Mount your bike, ensuring the thru-axle or quick release is secure. 3) Connect power and allow the trainer to calibrate. 4) Pair with your app via Bluetooth or ANT+. 5) Perform a spindown calibration after 10 minutes of warmup. 6) Set up a trainer mat, fan, and towel.
What equipment do I need for indoor cycling training?
Essential equipment includes: a smart trainer or spin bike, a fan (preferably high-velocity), a trainer mat, a towel for sweat, and a device for apps. Recommended additions: a rocker plate, indoor cycling desk, heart rate monitor, and front wheel block. Nice-to-haves include a dedicated indoor bike, smart fan, and large screen.
How effective is treadmill running compared to outdoor running?
Treadmill running is highly effective for maintaining fitness and can closely simulate outdoor running. Set the incline to 1-2% to compensate for lack of wind resistance. Studies show similar cardiovascular and muscular adaptations between treadmill and outdoor running. Main differences are reduced proprioceptive demands and slightly different muscle activation patterns.
How do I stay motivated during indoor training?
Motivation strategies include: Use virtual training apps for gamification. Schedule specific workout times. Join group rides or races. Set up an enjoyable training space. Vary workouts between structured intervals, virtual races, and recovery rides. Track progress with regular FTP tests. Reward consistency with goals like spring races.
What treadmill incline should I use for running?
For general running that mimics outdoor flat terrain, use 1-2% incline. For easy runs, 1% is sufficient. For tempo runs, 1-2% is appropriate. For hill training, use 4-8% for moderate hills or 10-15% for steep hill repeats. Avoid holding handrails as this reduces workout effectiveness.
How often should I calibrate my smart trainer?
Calibrate your smart trainer: After initial setup, after significant temperature changes, every 2-4 weeks of regular use, and before any FTP test. Always warm up for 10 minutes before calibrating. Some trainers like the Tacx NEO never require calibration due to their electromagnetic design.
The Bottom Line
A well-designed indoor training setup transforms winter from a fitness setback into an opportunity. With the right equipment, engaging software, and proper environment, you can maintain and even build fitness through the coldest months. Key takeaways:
- Invest in quality: A good smart trainer or treadmill pays dividends over years of winter training
- Prioritize cooling: A high-velocity fan is the single most important accessory
- Choose engaging software: Zwift for entertainment, TrainerRoad for structured training
- Create a comfortable space: Your pain cave should be somewhere you want to train
- Stay consistent: Regular winter training builds the base for spring performance
Use the winter months strategically, and you'll emerge in spring fitter than ever.
Related Tools & Guides
Featured at Backcountry — 15% off first order
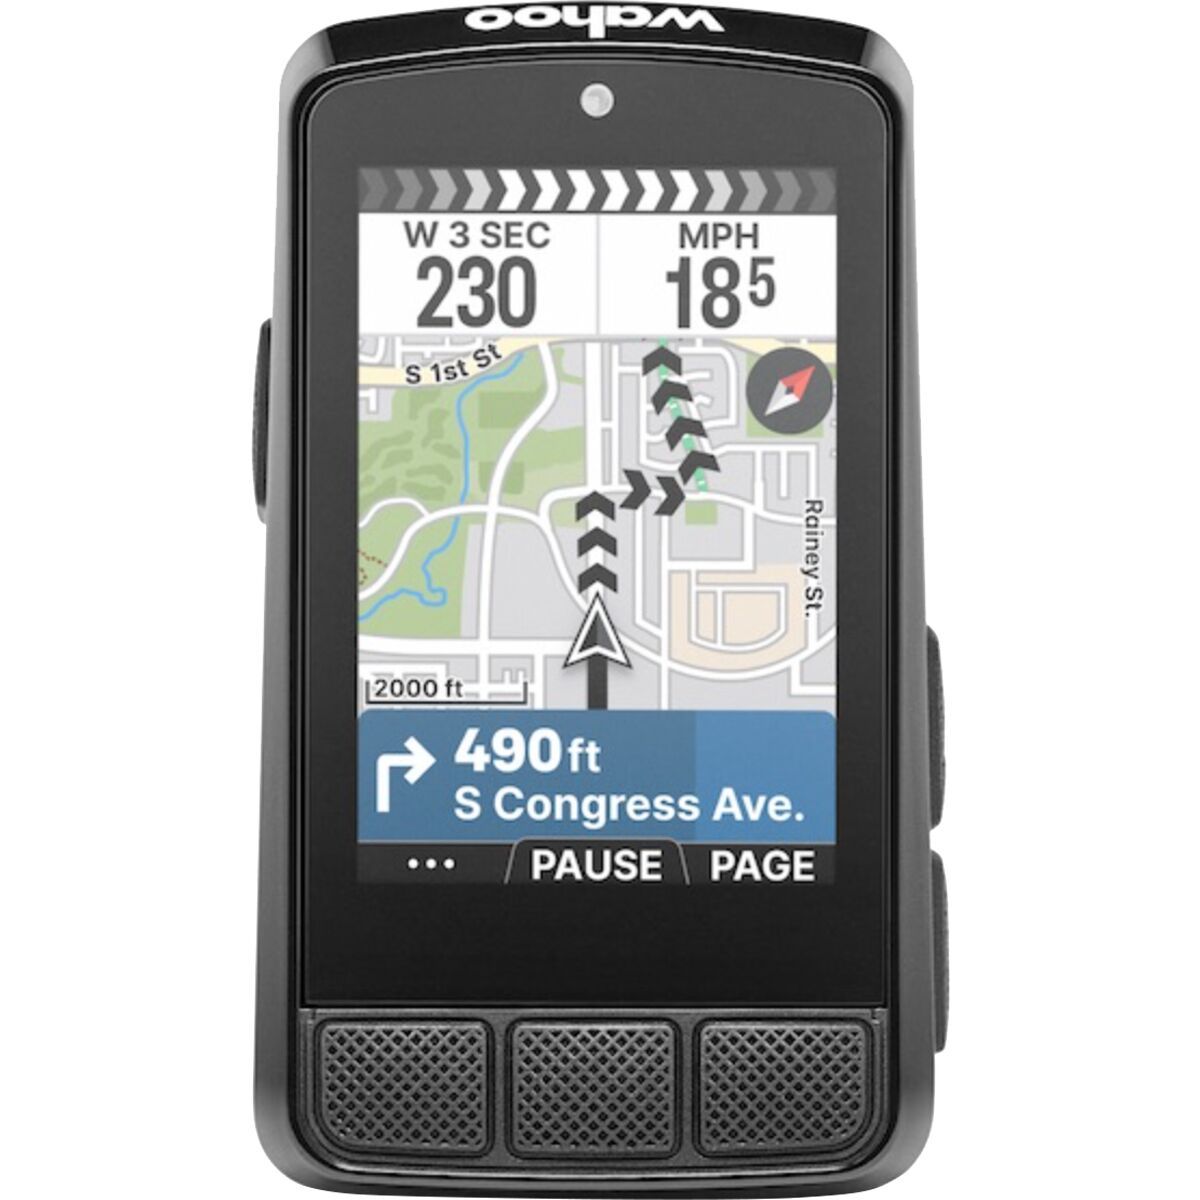
Wahoo ELEMNT BOLT 3
Track your rides with Wahoo's compact GPS — the bike computer we use daily.