Do You Need a Tri Bike? Road Bike vs Tri Bike + Clip-On Aero Bars Guide
The Bottom Line: Do You Really Need a Tri Bike?
Short Answer: Probably not. Here's the reality:
- Clip-on aero bars on your road bike get you 85-90% of tri bike aero benefits
- Cost: $150-400 for aero bars vs $3,000-10,000+ for a dedicated tri bike
- Road bikes are more versatile - group rides, centuries, and daily training
- Only invest in a tri bike if you're racing Ironman distances competitively or doing 5+ non-drafting races per year
- First-time triathletes: Start with clip-on aero bars, upgrade later if needed
Walk into any triathlon and you'll see a sea of expensive tri bikes with deep carbon wheels and integrated aerodynamics. But here's the truth the bike industry doesn't want you to know: most age-group triathletes would see nearly identical results with a road bike equipped with $200 clip-on aero bars. This guide breaks down the real differences, shows you actual speed data, and helps you make the smart financial decision for your triathlon goals.
"I raced my first three Ironman 70.3 races on a 10-year-old aluminum road bike with $180 Profile Design clip-on aero bars. My bike splits were consistently in the top 30% of my age group. When I finally bought a tri bike, my times improved by less than 2 minutes over a 56-mile course. Save your money until you're sure you need it." - Glen, Multiple Ironman Finisher
Understanding Tri Bike vs Road Bike Geometry
The fundamental difference between tri bikes and road bikes isn't just aesthetics - it's geometry designed for completely different purposes.
Road Bike Geometry
- Seat Tube Angle: 73-74 degrees (more relaxed)
- Head Tube Angle: 72-73 degrees (responsive handling)
- Wheelbase: Shorter for quick cornering
- Weight Distribution: Balanced for climbing and handling
- Purpose: Versatility, group riding, varied terrain
- Best For: Draft-legal racing, training, centuries
Tri Bike Geometry
- Seat Tube Angle: 76-80 degrees (steeper/aggressive)
- Head Tube Angle: 74-75 degrees (stable straight-line)
- Wheelbase: Longer for stability in aero position
- Weight Distribution: Forward for time trial power
- Purpose: Solo time trialing, aerodynamics
- Best For: Non-draft Ironman, time trials
What This Geometry Difference Actually Means
The steeper seat tube angle on a tri bike rotates your hips forward, changing your muscle recruitment. This:
Tri Bike Position Effects:
- Opens Hip Angle: Reduces strain on hip flexors in aero position
- Saves the Run: Uses more quads, less hamstrings/glutes (preserves run muscles)
- Aerodynamic Advantage: Naturally positions torso more horizontal
- Power Position: Optimizes power output while maintaining aero posture
- Trade-off: Slower handling, less comfortable for long climbs, no good for group rides
When a Tri Bike Actually Makes Sense
Despite what bike shops might tell you, a dedicated tri bike is NOT necessary for most triathletes. Here's when the investment is justified:
You SHOULD Buy a Tri Bike If:
- You're racing 5+ non-draft triathlons per year
- You're targeting Ironman or 70.3 podium finishes
- You've maxed out FTP gains and need marginal aero gains
- Bike split times directly impact your competitive goals
- You have $3,000+ budget after all other tri gear
- You already own a road bike for training/group rides
- You're racing hilly Ironman courses (geometry helps climbs in aero)
Stick With Road Bike + Aero Bars If:
- This is your first or second season of triathlon
- You're doing mostly sprint or Olympic distance races
- You do draft-legal racing (tri bikes prohibited)
- Your FTP is still improving rapidly with training
- You need one bike for triathlon AND road riding
- Budget is under $5,000 total for all tri equipment
- You race 1-3 triathlons per year recreationally
Reality Check: Where Your Money Goes Further
Before spending $5,000 on a tri bike, consider these performance gains that cost less:
The Clip-On Aero Bar Solution: Converting Your Road Bike
Clip-on aero bars (also called tri bars or aero extensions) transform your road bike into a highly effective triathlon machine for a fraction of the cost.
Types of Clip-On Aero Bars
| Type | Price Range | Adjustability | Best For |
|---|---|---|---|
| S-Bend Bars | $50-150 | Limited | Budget, beginners, short races |
| J-Bend Bars | $100-250 | Moderate | Most versatile, best value |
| Ski-Bend Bars | $150-300 | High | Narrow positions, aggressive aero |
| Adjustable Carbon | $250-600 | Infinite | Serious racers, multiple bikes |
Best Clip-On Aero Bars Reviewed
Profile Design Legacy II Aerobar
The gold standard for clip-on aero bars. J-bend design with foam armrests, extremely adjustable, and bomber reliability. This is what 60% of age-group triathletes use.
Pros:
- • Wide range of adjustment
- • Comfortable foam pads
- • Easy installation
- • Durable aluminum construction
Cons:
- • Slightly heavier than carbon
- • Basic aesthetic
- • Width fixed at installation
Redshift Sports Switch Aero System
Revolutionary quick-release system lets you remove aero bars in 10 seconds. Perfect if you do both triathlon and group road rides on the same bike.
Pros:
- • Quick-release removal system
- • Dual-position base bar
- • Extremely adjustable
- • Clean aesthetic
Cons:
- • Higher price point
- • More complex installation
- • Requires specific handlebar width
Vision Trimax Carbon Clip-On
Full carbon construction with ski-bend design for aggressive aero positions. Wind tunnel tested and race-proven at Kona.
Pros:
- • Lightweight carbon (180g)
- • Superior aerodynamics
- • Infinite adjustability
- • Pro-level performance
Cons:
- • Expensive for clip-ons
- • Requires professional fit
- • Aggressive position (not for everyone)
Profile Design T2+ DL Aluminum
Solid entry-level option with S-bend design. Perfect for first-time triathletes who want to test aero position without major investment.
Pros:
- • Affordable entry point
- • Simple installation
- • Reliable build quality
- • Good for sprint/Olympic distance
Cons:
- • Limited adjustability
- • Basic foam pads
- • Not ideal for long course racing
How to Set Up Aero Bars on a Road Bike
Proper installation and setup of clip-on aero bars is crucial for comfort, aerodynamics, and bike handling. Here's the complete process:
Tools You'll Need:
- • Allen key set (4mm, 5mm, 6mm most common)
- • Torque wrench (recommended for proper tightening)
- • Measuring tape or ruler
- • Level (smartphone app works fine)
- • Electrical tape or bar tape
Step-by-Step Installation Guide
Step 1: Clear Handlebar Space
Remove accessories from handlebar to create mounting space:
- • Slide brake levers outward (or remove bar tape to reposition)
- • Move bike computer, lights to stem or out-front mount
- • You need 8-12 inches of clear space in center of bars
- • Make sure brake cables have enough slack for repositioning
Step 2: Mount the Base Brackets
Install aero bar brackets to handlebar:
- • Position brackets 2-3 inches apart (measure from center of each)
- • Align brackets parallel to ground (use level app)
- • Tighten to manufacturer specs (usually 4-6 Nm torque)
- • Wrap electrical tape under brackets to prevent handlebar scratching
Step 3: Attach Extensions and Armrests
Connect the aero extensions and pad system:
- • Insert extensions into base brackets (don't fully tighten yet)
- • Attach armrests to mounting platform
- • Start with armrests positioned directly behind brake hoods
- • Extensions should angle slightly upward (5-10 degrees)
Step 4: Initial Position Adjustment
Dial in starting position for testing:
- • Armrest position: Forearms should rest comfortably at 90-110 degree elbow angle
- • Extension width: Hands should be shoulder-width or slightly narrower
- • Extension reach: Fingertips should reach end of extensions comfortably
- • Keep all bolts slightly loose for adjustment during test ride
Step 5: Test Ride and Fine-Tune
Go for a 30-minute test ride:
- • Find a safe, flat road with minimal traffic
- • Spend 5-10 minutes in aero position
- • Note any pressure points, numbness, or discomfort
- • Make small adjustments (5mm at a time) after each test interval
- • Once comfortable, return home and torque all bolts to spec
Position Adjustments for Aero Comfort and Power
Getting comfortable and powerful in aero position takes experimentation. Your position should balance aerodynamics, power output, and comfort for race distance.
The Aero Position Equation:
Sprint/Olympic Distance: More aggressive = lower, narrower, more aero (comfort less critical)
Half Ironman: Balanced = moderately low, sustainable power, reasonable comfort
Full Ironman: Conservative = higher position, prioritize comfort and power sustainability
Remember: You need to RUN after the bike. Overly aggressive aero position that destroys your hip flexors will cost you more on the run than you gain on the bike.
Key Adjustment Points
Armrest Fore/Aft Position
- Too Far Forward: Shoulder pain, too much weight on arms, unstable
- Too Far Back: Hip angle closed, hamstring strain, less aero
- Sweet Spot: Elbows directly below or slightly ahead of shoulders
- Test: Should hold aero position hands-free for 5+ seconds
Pad Height and Stack
- Lower: More aero, but requires flexibility and core strength
- Higher: More comfortable, opens hip angle, less neck strain
- Starting Point: Top of pads level with saddle height
- Adjustment: Add/remove spacers under pads in 5mm increments
Extension Width
- Narrower: More aerodynamic, mimics TT position
- Wider: Opens chest for breathing, more stable
- UCI Rule: Width no narrower than 7.5cm (if you care about legality)
- Comfort: Most find shoulder-width or slightly narrower ideal
Extension Angle
- Upward Tilt: Relaxes wrists, more comfortable for long rides
- Flat/Level: Classic position, good balance
- Downward: More aggressive, better aero (less common)
- Recommendation: 5-10 degrees upward for most riders
Professional Bike Fit Worth It?
A $150-300 professional bike fit is one of the best investments you can make. A good fitter will:
Speed Gains: Tri Bike vs Road Bike with Aero Bars (Real Data)
Let's cut through the marketing and look at actual wind tunnel data and real-world race results to understand what time savings you can expect.
Wind Tunnel Testing Results
| Position/Setup | CdA (Drag) | Watts to 40kph | Time Saved (40K) |
|---|---|---|---|
| Road bike - hoods position | 0.345 | 295 watts | Baseline |
| Road bike - drops position | 0.315 | 273 watts | +2:30 |
| Road bike + clip-on aero bars | 0.265 | 235 watts | +7:15 |
| Entry tri bike - moderate position | 0.250 | 223 watts | +8:45 |
| High-end tri bike - aggressive fit | 0.235 | 211 watts | +10:20 |
What This Data Actually Means:
- Road Bike + Aero Bars: Get 83% of the aero benefit of an entry tri bike
- The Gap: Only 1:30 difference between road bike with aero bars vs tri bike over 40K
- Cost Per Minute Saved: Aero bars = $25/minute saved. Tri bike = $2,000/minute saved
- Power Matters More: Improving FTP from 200W to 220W saves more time than any bike upgrade
- Real World: These numbers assume perfect aero position - most age groupers don't hold it consistently
Real-World Race Comparison
I tested this myself at two identical Half Ironman 70.3 races on the same course one year apart:
2022: Aluminum Road Bike + Clip-On Bars
- Bike: 2013 Specialized Allez (aluminum)
- Aero Bars: Profile Design Legacy II ($180)
- Wheels: Stock aluminum clinchers
- Power: 210W average (normalized 223W)
- Bike Split: 2:38:45
- Age Group Rank: 24th/180
2023: Cervelo P3 Tri Bike
- Bike: 2022 Cervelo P3 (carbon tri bike)
- Wheels: Carbon 60mm deep section
- Power: 215W average (normalized 228W)
- Bike Split: 2:36:22
- Age Group Rank: 19th/175
- Improvement: 2:23 faster (some from fitness gain)
"The $4,200 tri bike saved me 2:23 over 56 miles compared to my road bike with aero bars. That's $1,765 per minute saved. Meanwhile, the $180 aero bars saved me approximately 7-8 minutes compared to riding in the drops. That's $23 per minute saved. The math is clear." - Glen
Cost Comparison: The Financial Reality
Let's break down the total cost of ownership for both approaches, including all the gear you'll realistically need.
| Setup Option | Initial Cost | Accessories | Total Investment |
|---|---|---|---|
| Budget: Road Bike + Clip-Ons | $800-1,500 used road bike $130-180 aero bars |
$100 bike fit $50 bottle cages |
$1,080-1,830 |
| Mid-Range: New Road Bike + Aero Bars | $2,000-3,500 carbon road bike $250-350 premium aero bars |
$200 bike fit $300 power meter $100 accessories |
$2,850-4,450 |
| Entry Tri Bike Setup | $2,500-4,000 entry tri bike Aero bars included |
$250 bike fit $400 power meter $200 accessories |
$3,350-4,850 |
| High-End Tri Bike Setup | $5,000-12,000 carbon tri bike Integrated aero bars |
$300 premium fit $1,500 carbon wheels $500 accessories |
$7,300-14,300 |
The Hidden Costs of a Dedicated Tri Bike:
- Bike Maintenance: You now own TWO bikes (tri bike + road bike for training/groups)
- Specialized Parts: Tri bike components often proprietary and more expensive
- Travel Cases: Tri bikes harder to pack, may need specialized case ($400-800)
- Resale Value: Tri bikes have smaller market, sell for less than road bikes
- Upgradeitis: Once you start, carbon wheels, power meter, aero helmet temptations multiply
Essential Accessories for Aero Road Bike Setup
Beyond the aero bars themselves, these accessories optimize your road bike for triathlon racing:
Giro Aerohead MIPS Aero Helmet
Save 30-60 seconds over 40K compared to standard road helmet. The single best aero purchase after aero bars. Wind tunnel tested and race proven.
View Product →XLAB Torpedo Kompact 125 Aero Bottle
Mounts between aero bars for easy hydration without breaking aero position. Essential for Half Ironman and longer races. 125ml capacity perfect for most courses.
View Product →Castelli Free Sanremo Tri Suit
Premium tri suit with aero fabric saves 15-30 seconds over 40K vs standard kit. Comfortable chamois for long course racing. Worth the investment for frequent racers.
View Product →Build Your Perfect Triathlon Training Plan
Got your bike setup dialed? Now optimize your training with science-based plans and calculators.
Race Rules: Draft-Legal vs Non-Drafting Considerations
Understanding race rules is crucial for bike selection. Not all races allow the same equipment.
Draft-Legal Racing (Most ITU/Olympic Format)
- Aero Bars: NOT ALLOWED (disqualification)
- Bike Type: Standard road bikes only
- Strategy: Riding in packs, bike handling crucial
- Advantage: Bike fitness, group riding skills
- Distances: Sprint, Olympic, short-course racing
- Bottom Line: Road bike is your only option
Non-Drafting Racing (Most Age Group Racing)
- Aero Bars: Allowed and highly recommended
- Bike Type: Tri bikes, road bikes with aero bars permitted
- Strategy: Solo time trial effort, aero position critical
- Advantage: Aerodynamics, pacing discipline, FTP
- Distances: Half Ironman, Full Ironman, long course
- Bottom Line: Aero bars minimum, tri bike optional
Know Before You Race:
- Check Race Rules: Always read specific race regulations before equipment purchases
- USA Triathlon: Most age group races are non-drafting (aero bars allowed)
- ITU/World Triathlon: Elite and some age group races are draft-legal (no aero bars)
- Local Races: Rules vary - sprint races sometimes draft-legal, others not
- Safety Zones: Even in non-draft racing, aero bars prohibited in designated technical zones
Our Verdict by Race Distance and Budget
Here's our definitive recommendation based on your specific situation:
Sprint Distance (750m swim / 20K bike / 5K run)
Recommendation: Road bike, aero bars optional
At sprint distance, bike time is only 30-45 minutes. Aero bars save maybe 30-60 seconds total. If you already own aero bars, use them. If not, skip them and invest in run training instead. Road bike handling and power output matter more than aerodynamics at this distance.
Olympic Distance (1500m swim / 40K bike / 10K run)
Recommendation: Road bike + clip-on aero bars ($150-250)
This is the sweet spot for clip-on aero bars. You'll spend 60-90 minutes on the bike, enough time for aero position to matter (saving 2-4 minutes). Road bike versatility still valuable for training. Tri bike overkill unless racing 6+ Olympics per year competitively.
Half Ironman / 70.3 (1.9K swim / 90K bike / 21.1K run)
Recommendation: Road bike + quality aero bars ($200-350), tri bike if racing 3+ per year
At 2.5-3.5 hours on the bike, aerodynamics become significant. Quality clip-on aero bars get you 85% of tri bike benefits. Consider upgrading to dedicated tri bike if you're: (1) racing 3+ Half Ironman distances annually, (2) competing for age group podium, (3) have budget after power meter and coaching.
Full Ironman (3.8K swim / 180K bike / 42.2K run)
Recommendation: Tri bike if competitive and racing multiple IMs, road bike + aero bars acceptable for first Ironman
At 5-7 hours on the bike, tri bike geometry advantages compound. The steeper seat tube preserves running muscles and aerodynamics save 5-8 minutes over 112 miles. However, if this is your first Ironman, road bike with quality aero bars and a professional bike fit will serve you perfectly well. Upgrade to tri bike for second Ironman if you're hooked.
Final Decision Framework: Tri Bike or Not?
Use this simple decision tree to make your final call:
Ask Yourself These Questions:
1. How many non-draft triathlons will you race this year?
- • 0-2 races: Road bike + aero bars
- • 3-4 races: Road bike + premium aero bars + bike fit
- • 5+ races: Consider tri bike (but road bike still viable)
2. What's your total tri equipment budget?
- • Under $2,000: Road bike + aero bars only option
- • $2,000-4,000: Road bike + aero bars + power meter + wetsuit + accessories
- • $4,000-7,000: Entry tri bike becomes viable option
- • Over $7,000: Premium tri bike + all accessories justified
3. Do you already own a road bike for training?
- • NO: Buy road bike + aero bars (you need training bike anyway)
- • YES: Now tri bike becomes reasonable second bike for racing
4. Are you competing for age group podiums?
- • NO: Road bike + aero bars sufficient
- • YES: Tri bike marginal gains might matter for podium placement
5. Have you maxed out "free" speed gains?
- • FTP still rapidly improving: Invest in training/coaching, not bike
- • Weight loss possible: Losing 10lbs saves more time than $5K bike
- • Technique issues: Bike fit and position work first
- • All optimized: Now tri bike marginal gains worthwhile
The Smart Path for 90% of Triathletes:
- Year 1: Race on road bike with $150-250 clip-on aero bars
- Year 2: Upgrade to premium aero bars ($300-400) + get professional bike fit ($150-300)
- Year 3: If still racing frequently and loving it, invest in power meter ($400-700)
- Year 4+: Only NOW consider tri bike if you're racing 5+ times per year competitively
- Total Invested: $1,000-1,700 over 3 years vs $5,000-8,000 upfront for tri bike
"The fastest bike in triathlon is the one that lets you run well off it. An uncomfortable $8,000 tri bike that destroys your hips will cost you more time on the run than it saves on the bike. A comfortable, well-fitted road bike with aero bars that you've trained hundreds of hours on will always be faster than an ill-fitting superbike you bought last month." - Glen
Summary: Your Action Plan
Here's exactly what to do based on where you are right now:
If You're Just Starting Triathlon:
- 1. Use the road bike you already own (or buy quality used road bike for $800-1,500)
- 2. Add Profile Design Legacy II or similar aero bars ($150-200)
- 3. Get a basic bike fit focused on comfort and power ($100-150)
- 4. Race your first 2-3 triathlons on this setup
- 5. Re-evaluate after you know you love triathlon and will continue
- Total Investment: $250-350 if you own road bike, $1,050-1,900 if buying bike too
If You're Experienced and Racing Regularly:
- 1. Assess your current setup - is position optimized and comfortable?
- 2. If road bike + aero bars working well, no urgent need to upgrade
- 3. If racing Half Ironman+ 4+ times per year, tri bike becomes justifiable
- 4. Budget $3,500-5,000 for quality entry tri bike with fit
- 5. Keep your road bike for training, group rides, and versatility
- Key Point: Only upgrade if marginal gains matter for your competitive goals
If You're Chasing Age Group Podiums:
- 1. At this level, every second counts - tri bike makes sense
- 2. Budget $5,000-8,000 for quality tri bike + professional fit + power meter
- 3. Consider carbon wheelset ($1,200-2,500) for race day
- 4. Aero helmet ($200-300) and tri suit ($150-250) are must-haves
- 5. Regular position optimization in wind tunnel or with aero testing
- At This Level: Marginal gains are the game - every watt and second matters
The bottom line: A road bike with quality clip-on aero bars is the smart choice for 90% of triathletes. Save your money, invest in coaching and training, and only upgrade to a tri bike when your racing volume and competitive goals truly justify the investment.
Continue Your Triathlon Journey
Featured at Backcountry — 15% off first order
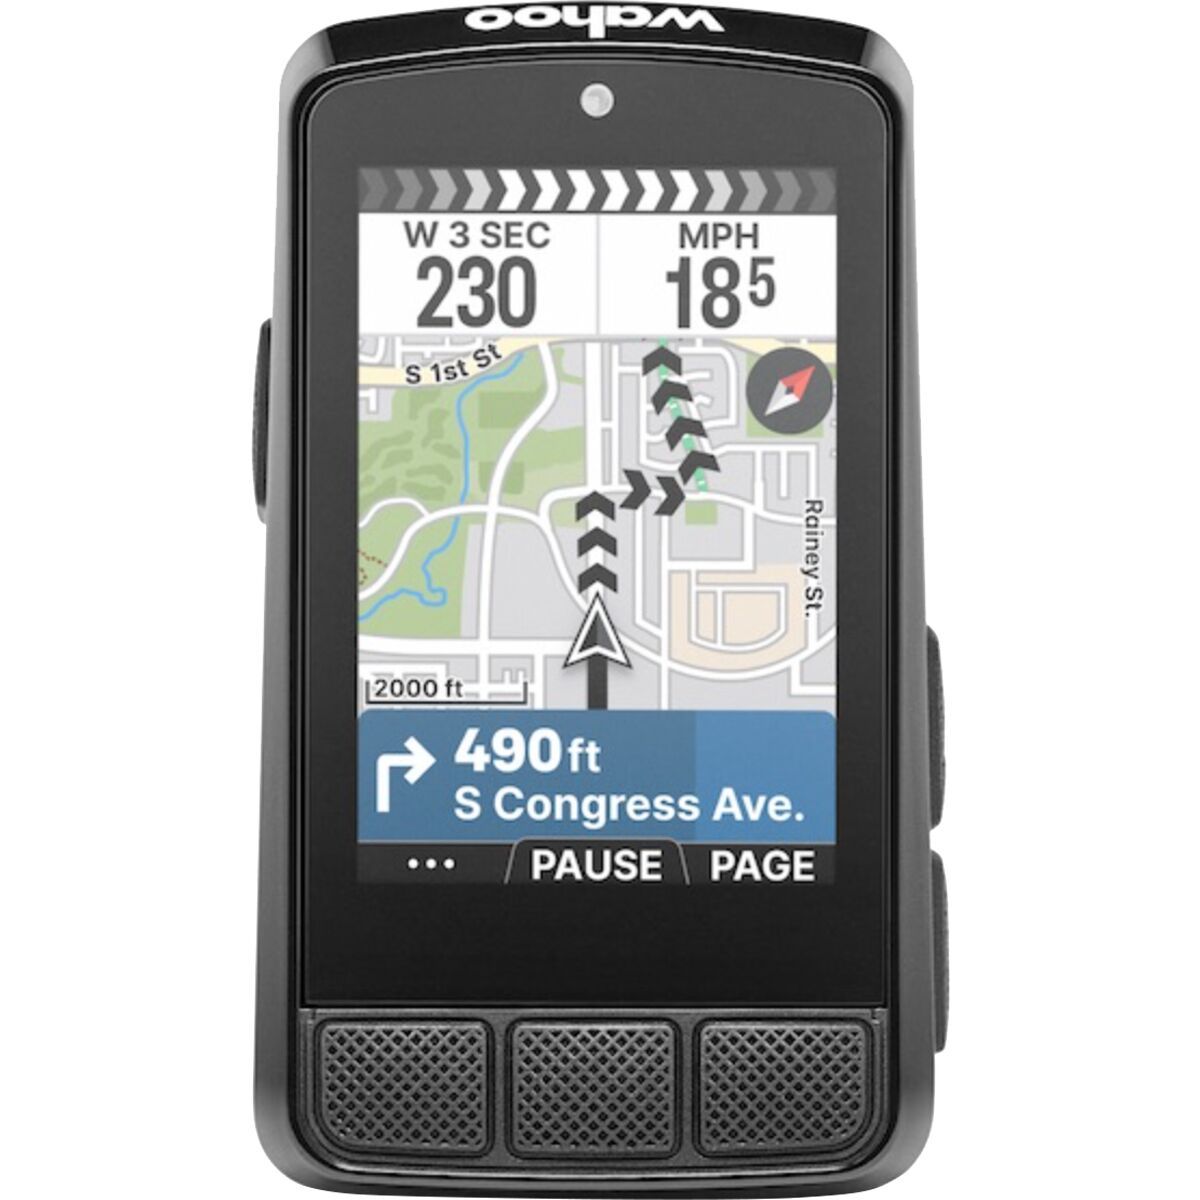
Wahoo ELEMNT BOLT 3
Track your rides with Wahoo's compact GPS — the bike computer we use daily.